Showing posts with label gluten free. Show all posts

Tuesday, July 28, 2015

Homemade Cold Brew Coffee ~ Using Household Items UPDATE

A brief history of my interactions with coffee: the acid hurts my belly >__>

The End.

Espresso: ouch
Fresh ground coffee: ouch
Keurig Coffee: super ouch (and icky)
Wawa Coffee: super super ouchies
Cold Brew: lalala!!! *stars in eyes I love you forever you're gorgeous*

But.

Cold brew is the new fad among coffee drinkers, so obviously it's going to be quite expensive. I usually pick up a bottle or two of Stumptown Cold Brew, and it runs me approximately $3 something a 12 ounce bottle. Ouch, again.

What's so awesome about cold brew?? Well! Due to the way in which it is...brewed...the acid level is low and bloating post-consumption is zilch! It's a coffee fiends dream of dreams! The perfect drink-all-day-everyday concoction o' happiness!

So! I decided to look up some methods of brewing on the Internets and recreate my own version with instruments I have laying around the old homestead!

Instruments (NOTE: I mistakenly put 6 ounces of water in the original post instead of 6 cups water)
Large 24 ounce+ container with a lid
fine strainer - so that the coffee grounds stay, but the liquid does not :D
Coffee filter
6 ounces of rough ground coffee - like the good stuff
6 cups of filtered water
rubberband
Larger, pourable container (for after the coffee is all done and ready to sit your fridge and be consumed at your discretion)

1.  Combine water and coffee. Place in 'fridge for 12 hours (or 18 if you like it super strong like me!)
2. Take out of 'fridge and pour through fine strainer into another container (I used my blender because it was sitting around all lonely-like)
3. Using the original container with which the coffee/water concoction was first kept (though you may want to rinse it a bit), place a coffee filter over the opening and secure with a rubber band
4. Slowly pour liquid through the filter
5. Once completely strained, pour remaining liquid into serving bottle of choice. I recommend something 24 ounces or larger

6. Refrigerate and enjoy! Personally, I mix with unsweetened almond milk - but do what you will!
Low-acid goodness right tharrrr !

Other than that, my husband and I are attending the Refused and Faith No More show in Philadelphia, taking away all toys/furniture/items our toddler decides to smack out of anger, and I'm embracing permanently wearing this Cat with Glasses T forever and ever:
photo by the ever-talented and blurry Photo Booth option on Mac

Tuesday, May 12, 2015

Banana Split Nice-Cream ~ Raw/Vegan

mmm. MMM.

I have been craving banana "ice cream" allllll winter! There's a small, local place that is only open April through October and it serves this amazing ice cream alternative made exclusively of bananas! Due to this obsession of mine, a few years ago my husband bought me the exact machine the restaurant uses, and needless to say it has served our household well ~ birthdays, dessert-for-dinner, breakfasts, and et cetera !

So! Right around the beginning of May (yes, that's when I began this post and then life and *ahem* Game of Thrones, Mad Men, Veep, oh and a full-time job got in the way) the fam visited our favorite little restaurant where we ordered beautifully constructed banana ice cream concoctions made up of varying fruits and *healthy* alternative toppings (e.g., coconut, granola, non-dairy chocolate chips, sunflower seeds) - it was heaven in the mouth, but I wanted more...MORE >:D

Thus, the very next day I created this:

Recipe Deets (You will need a food processor or homogenizer ~ if you don't have these a blender will work but you will need to add milk, approximately 1/2 cup per banana)

5 frozen bananas (peeled)
1/2 cup frozen cherries
1/2 tbsp raw cacao powder
1 tsp vanilla extract
1/2 tbsp unsweetened coconut (optional)
1/2 tbsp raw cacao nibs (optional)
2 bowls
1 large mug

- in the first bowl process or homogenize 1 1/2 bananas, transfer to a blender and add cacao powder and vanilla ~ blend well and place in freezer
- in the second bowl process or homogenize 1 1/2 bananas then transfer to a blender. Add cherries and blend until it turns a pretty pink (there will be chunks of cherry...this is cool...very cool), place in freezer
- using the mug (which will be your BASE banana portion, see photo above) process or homogenize 2 bananas
- remove cherry and chocolate portions ~ add the chocolate portion to your mug (with the plain banana base already in place), then add the cherry portion on top
- sprinkle with coconut and cacao nibs

Smash in face, dribble some down your chin, wipe your mouth on your sleeve - all without guilt!

Do it.

Monday, April 20, 2015

Overnight Blueberry Chia Seed Pudding ~ Raw/Vegan

This one is super easy, almost zero effort involved, and perfectly amazing on the belly! I'll keep the yapping brief tonight, as it's the end of my 4-day awesome weekend with my husband! We celebrated his 30-something birthday with days packed full-o-fun...so essentially I'm tired and looking to turn my brain off and relax, cocktail in hand of course ha...ha

I'm currently on my 2nd week of RawTill4. I'm beginning to consider making this a lifestyle choice for a few reasons:

1. Even though my husband and I were traveling all over the place Friday and Saturday, I managed to find places to eat that adhered to my new dietary regime.
2. I've never felt less bloated throughout the day as when I am eating clean, uncooked foods
3. I don't calorie count <--- huge deal for me
4. I've slimmed down - this is because of less daytime bloat AND continuing a strict workout regime. Eating healthy is great, but without physical activity and strengthening your body you're looking at a physique that may appear optimum but isn't. Skinny doesn't equal healthy. Strong and toned is what I shoot toward!

Anyway! On to the easiest of RawTill4 recipes yet!

Recipe Deets

1 air tight container (12 ounce or larger)
1 cup unsweetened almond milk (or coconut milk)
1 cup fresh blueberries
3 tbsp chia seeds (protein explosion!!)
1 tsp vanilla extract
dash of cinnamon

- Place all ingredients in mason jar (or airtight container) and refrigerate overnight
- The End

So good. Like hide in a corner so your kids don't see you and ask for you to share...type of good.

Below is a little picy collage of my weekend with the husband...food and all! Now back to reality :s


Saturday, April 11, 2015

Raw Zucchini Pasta w/Marinara ~ 1st Day RawTill4!

It's time to reset the mental and physical clocks! Winter is over, the weather is starting to creep into the 60s, and I'm ready to break free from some bad habits I've held on to for the past few months!

Bad Habits 101 

1. Bad habits are sneaky - one day they're like "hey, I'm new here, would you mind showing me around?" And before you know it you're their best friend, they can't do anything without you, you've shown them the best of times and without you life just wouldn't be worth living...

2. Bad Habits are rude - they only take take take. They demand this, and want that! Oh I'm sorry are you busy trying to do something beneficial for yourself? Too bad! Bad Habit here needs some YOU time...N.O.W. 

3. Bad Habits like salty snacks all day. Like even at 2 am. As I said, they're rude.

4. Bad Habits make you eat your toddler's snacks in mass amounts because they don't care who else may need them (psst...the toddler).

5. Bad Habits eat dinner, dessert, and second desserts even when full. Why? BECAUSE THEY'RE A BAD HABIT!

6. Bad Habits give you tummy aches because they tell you to consume things that they know will make your insides cry (i.e. stuffs that contain sesame...ugh)

7. Bad Habits are costly and create larger-than-life food budgets

So - how did I make it through the past 3 months without gaining a pound and actually losing a few inches round the ol waist? Lots of gym time, lots of crash diets, lots of skipping meals, lots of poor dietary decisions that I knew wouldn't last.

Well here we are - day one of RawTill4! I'm hoping that eating only raw vegan foods from my waking moments until 4pm will aid me in reseting the internal clock so that my cravings for salt/caffeine/anything that fits in my mouth...will subside. Generally the RawTill4 diet involves eating a million calories during the day and high carb/low fat at night. Lots of bananas, lots of dates, fruits a la all the time, smoothies fo' life, 100 ounces of water, etc etc...well I ain't doing it that way. As with almost anything I set out to do, I tend to change things up to fit my life and what I know about my body. Plus bananas and smoothies all the times sounds boring. And I'm easily bored...

So! Along with regular healthy recipes, I will be including my raw food journey and posting recipes I've come up with as I move along.

Recipe Deets (you will need a spiralizer or some contraption to spiralize the zucchini)

Noodles
- 2-3 medium zucchini
- a bit of sea salt

Marinara 
- 4 roma tomatoes
- 1 shallot (diced)
- 2 cloves garlic (sliced)
- handful of sundried tomatoes
- handful of chopped cilantro
- bit of sea salt

1. Spiral your zucchini and place in colander. Cover with a bit of sea salt and allow to sit while water drains. You may need to press the noodles with paper towels.
2. In a high speed blender add all marinara ingredients and blend until smooth
3. Place noodles in a bowl and top with sauce - feel free to add some cherry tomatoes and basil!


Now go get a coffee at 4pm on the dot like I did, because coffee is awesome and only lame people think they can avoid caffeine allllll day!

Tuesday, March 24, 2015

Protein Blast! Curried Coconut Quinoa with Black Beans ~ Toddler Approved!

Let's just get this out in the open: this meal was inspired by diaper rash. Not just any ol diaper rash, but the very painful, tears in my daughter's eyes kind of rash that makes diaper changes horrible for both parents and baby. So yea, no good at all! I did a little research and realized that citrus and acidic foods may worsen a rash on a little baby's bottom, and while Mirabelle has no known allergies, she had been consuming mass amounts of strawberries, kiwi, raspberries, and tomatoes. Poor little bean.

So! I immediately came up with a meal using ingredients I already had on hand (minus the avocado) that would be dense in nutrients and low in rash-causing acids!

Recipe Deets
1 cup uncooked  organic quinoa
1 can organic black beans (drained and rinsed)
2 cups organic low sodium vegetable broth (or water)
1/2 diced white onion
2 cloves minced garlic
1 tbsp (or more to taste) curry powder
1 tbsp organic coconut oil

Side Suggestions
baked butternut squash
avocado (lightly salted with pink himalayan  sea salt)

- In a medium sauce pan, bring to a boil vegetable broth (or water), quinoa, and curry powder. Once boiling, reduce heat to low and simmer until broth/water is absorbed (approximately 15 minutes)
- Once quinoa is cooked, remove from heat and set aside
- In a large frying pan, heat coconut oil for 30 seconds on medium heat
- Add onion and fry for a few minutes until soft
- Add black beans and garlic, fry for a couple minutes
- Lastly, add quinoa and stir all ingredients together
- Fry everything for another 5 minutes and feel free to add a bit more coconut oil for moisture

Serve hot for adults and warm for baby mouths! I added baked butternut squash (cut, skin, and cube fresh butternut squash. Drizzle a bit of olive oil on top and bake for 15 minutes in an oven at 450°) and lightly salted avocado. My 1 year old went crazy, and my husband spooned mouthful after mouthful of quinoa directly from the pan because he was "tasting" it ha...ha

Now go enjoy something that's not gonna put a rash on your bottom!


Wednesday, March 18, 2015

Vegan, Gluten Free Lentil Loaf

Yep, lentils again and again and again! And who would've thought I disliked lentils not even a month ago? This post is a bit different than my previous listed recipes, as it is taken directly from Veggies By Candlelight, but I really wished to share it because the loaf turned out so well that even my meat eatin', pork roll lovin', mac & cheese all day everyday Step-Daughter LOVES the thang!
So! If you're looking for high-protein, low fat, zero complex carbs, vegan, and gluten free...well, you've arrived! Lucky, huh?

So hop, skip, stroll on over to Veggie By Candlelight and have yourself a vegan "meat"loaf smash-in-face fun time!

Friday, January 30, 2015

Vegan Cheese and Gluten Free Chocolate Cake with Chocolate Ganache Love!

The husband and I appreciate food. What I mean by that little, yet weighty (ha, weighty is a real word) statement is that he and I will try anything  as long as it's considered vegetarian. I know, I know. We have been consuming fish lately, but! that little butty-but is of our own accord and on our own terms. When we have the rare opportunity to sneak out to dinner...you know, fellow parents, when the babies are babysat and the teenagers are otherwise indisposed (i.e., being all cool at dance par-tays) - so! when we venture out it's most typically a quality vegetarian/vegan restaurant so that we may experience new and unusual tastes in an innovative, meat-free way!

Skip ahead the two-months (or so) since my husband and I have had the chance to buzz out for an evening alone, I decided to purchase a gourmet cheese substitute that I had read on various lovely blogs that raved about the taste, texture, and ingredients that lacked all forms of negativity! In other words, this cheese is friendly on the belly. Chicago based Ste Martaen creates artisan vegan cheese with simple, pure ingredients that are likely to appeal to everyone from the uber-vegan through the gluten free/soy free (my crazy skin allergies included!).

I ordered the Olive Cheese: purified water, agar, organic cashews, nutritional yeast, lemon juice, tahini, sea salt, spices, pimientos, green olives, Dijon mustard, citric acid (copied from the website)

I purchased tiny bruschetta applicable toasts and thinly sliced the cheese to fit on top. The taste of the cheese is complex with varying levels of "heat" one would associate with spiced cheese, but also the warm, sweet nature of the olive was present. The only issue was with my husband, and no reflection of my opinion, he felt the consistency of the "cheese" was more like a spread-type cheese than an actual block of firm cheese. He's correct, but I feel like it does not hinder the taste or depth of how impressive this vegan cheese is. I super recommend ordering from this husband and wife company!

Posh Pop Bake Shop - Haddonfield, NJ
Today, of all beautiful Fridays, I was able to get out of work early. Software testing went well, people agreed with each other, life was just moving along perfectly, and voila! I found myself with a free afternoon of twin sister time...a little Whole Foods, a little con-ver-satin...ya know?
Buzz...beep...blip...doop...derp...ahead 45 minutes and I found myself at the 
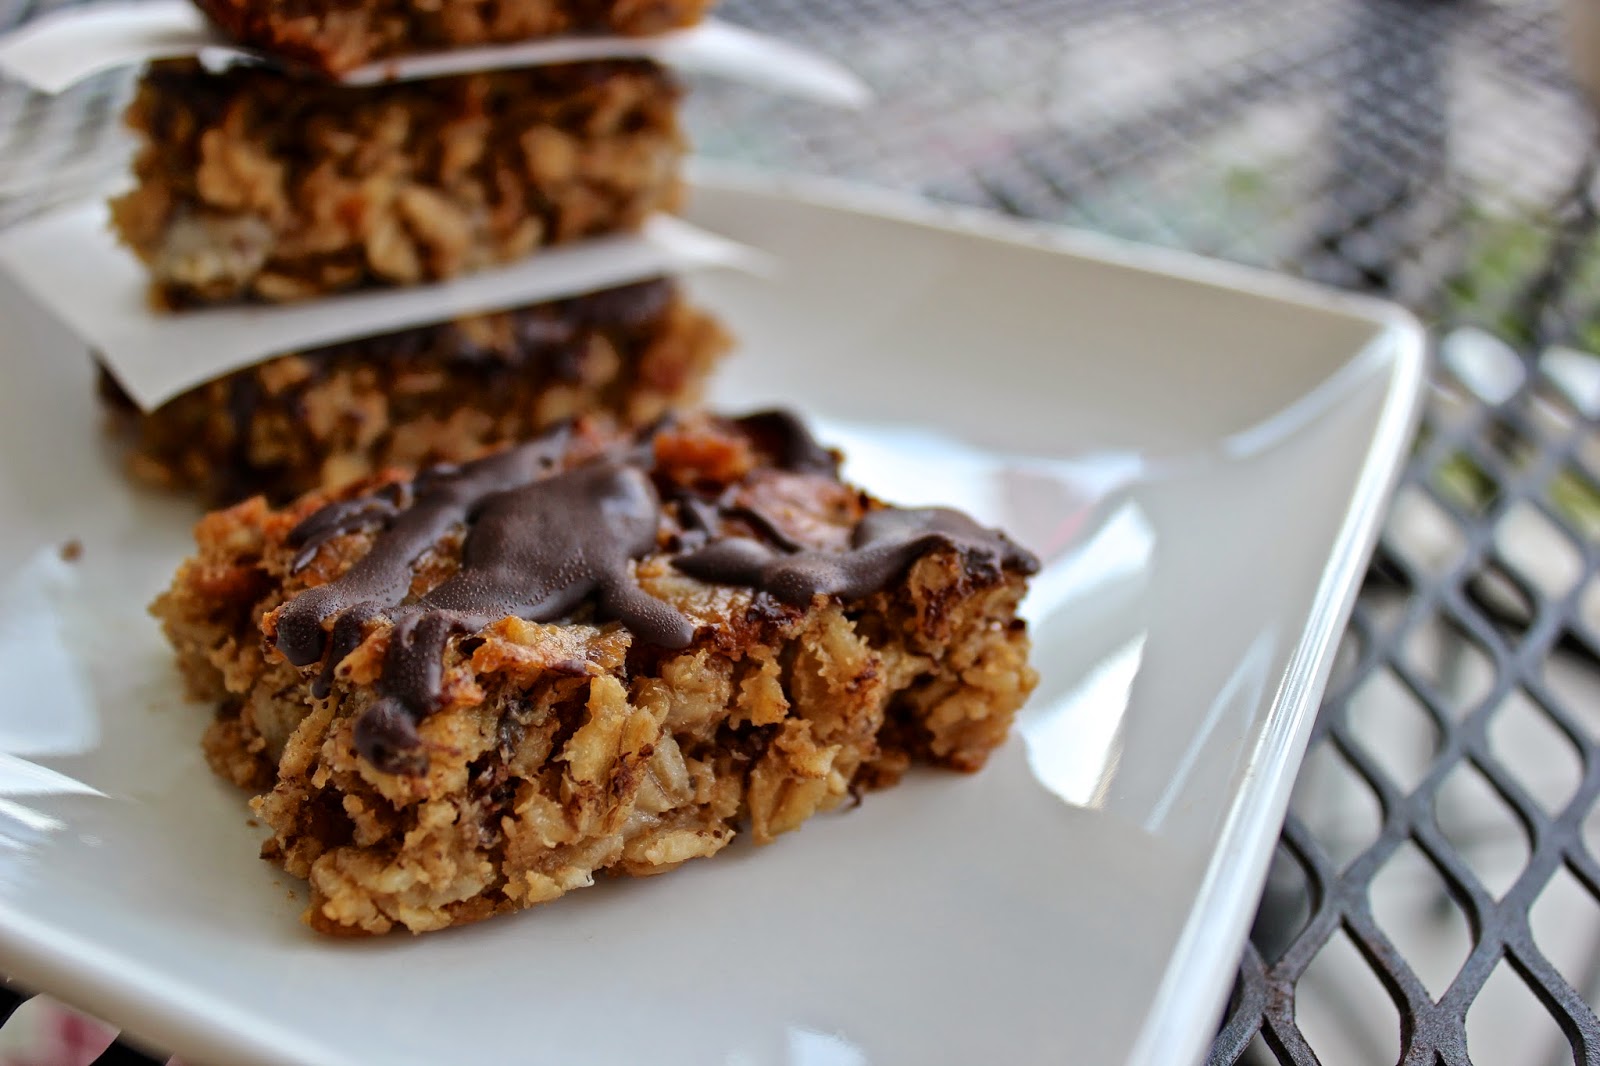
Posh Pop Bake Shop to taste-test some gourmet gluten free goodies for my daughter's 1st birthday (i.e., macaroonssssss). So! After speaking with an extremely helpful, fast-talking (like, super fast...and I speak quickly) baker, I left with three gluten free macaroons (vanilla with chocolate ganache, chocolate with nutella, and chocolate with chocolate ganache) along with 2 slices of gluten free fudgey, gooey chocolate cake for my husband and step-daugher (weekend treats!).

As I walked out one door, I stepped into another next-door into a small, local coffee house (I regret that I forget the name) for a double espresso. There I tasted the macaroons, leaving portions for my husband, step-daughter, and mother, and was extremely surprised by the light *crunch* and balanced, separate  flavors between filling and shell. In other words, I was sold. I would be purchasing macaroons as one of the numerous desserts for my daughter's 1st birthday.

But onto the point! The insanely good chocolate cake! Some believe that gluten free equals no taste, but I learned from working with a lady with celiac's disease that gluten free doesn't necessarily mean taste free. This was the case in regards with the cake. Both my husband and step-daugher were pleasantly surprised by how rich, moist, and downright fudge-filled the cake proved to be!

All in all, I'm proud to have supported two small, health-friendly companies that have decided to pursue lifestyles outside of the norm in the name of tummy-happy customers and renewed methods of existence!

Friday, January 23, 2015

Healthy, Toddler-Friendly Banana Blueberry Muffins !

In one 24 hour period (or maybe it was less, like an 8 hour work day, yea, it was less, who am I kidding) my brain suddenly declared, "You, 11 month old infant, will eat food! Real food and not just that puree crap!" So that was it, I texted my husband at work and told him what was happening. He's so used to my wavering interests and sudden bursts of zeal that he calmly responded with something along the lines of an "okay". All the while, I'm practically jumping out of my chair at work, unable to focus on anything else other than neato healthy recipes for the daughter and how fun it's going to be NOT to have to insert a spoon into her face! *insert disturbing look akin to bloodlust*

While her first dinner was super simple due to poor planning and post-work parents, it went amazing! She had organic mac & cheese, steamed broccoli, and steamed apples with cinnamon. She was in heaven. Her little fingers moving more decisively than my brain ever does. Her chipmunk cheeks sneakily storing rations for a later time. All the while, the spouse and I gawked like children ourselves at how amazing life and growth and small human brains can be!
*sigh* ANYWAY.

Recipe Deets (warning, these will be more "dough-like" for soft bebe mouthes)

2 cups organic gluten free oat flour
2 organic bananas (mashed)
1 cup organic frozen or fresh blueberries
1/4 cup raw organic agave
1/4 cup organic unsweetened applesauce
2 tsp baking powder
1 tsp vanilla 
pinch of salt

Preheat oven to 350 F

- combine dry
- combine wet
- combine dry and wet (yadda yadda yadda)
- insert into 12 muffin cups
- bake 20-25 minutes (I know, crazy different times! Make sure toothpick comes out clean)

Feel free to toast the muffins in a toaster oven or on a pan and add a little cream cheese/butter like we did! Mirabelle absolutely LOVED them!

A bit of a side note: Less than one month and counting until I have a 1 year old toddler on my hands...


Saturday, January 17, 2015

Blackened Tuna Steaks with a Simple Beet Salsa

So, I turned 31 this year and I'm feeling pretty dandy! Honestly, this year has been a roller coaster of good, bad, and in-between. First I turned 30. Second, I birthed my first child! Who has proven to own the strongest, most stubborn personality I've experienced come from such a small human (and I love it!). Third, new home that the little family and I love. Fourth, I switched jobs. This was so important. I was very happy and comfortable at my former employment, but in the end making $38,500 a year at my age, with a family, and in New Jersey just isn't feasible. It's truly sad how much money governs our daily choices - positively and negatively. I came from a childhood where I never wanted or needed for anything. Money wasn't an issue and I lived in a form of blissful ignorance well through high school. No 'mo, no 'mo! So, the summer of 2014 I started my search for new employment and was lucky enough to find a job in the beginning of October that would boost my income and help the husband and I exist within a budgeted, but comfortable environment (damn you school loans...damn...you...haha). Anyway, again, I turned 31 this week and my husband made the family a fancy dinner in celebration.

Oh. And he also created this (while off, with the infant, and cleaned the house, and prepared the meal...sorry, I had to brag about him for a moment...moment over.)

Recipe Deets

3 Wild Tuna Steak Filets
Fresh Thyme (to taste)
Dried Italian spice mix (to taste)
Sea Salt (to taste)
Smoked Paprika (to taste)
Zip Lock bag

Salsa
3 beets (skins removed and chopped into cubes)
Fresh Parsley
Sea Salt (to taste)
1/2 cup chopped scallions

- Make salsa
- Heat pan on medium/high, spray with oil, and add scallions for approximately 3-4 minutes
- Add beets and cover on medium/low for 10-15 minutes until soft
- While cooking beets, in a ziplock bag add all spice ingredients for Tuna
- Place each individual Tuna steak in ziplock bag and cover with spices
- Prepare pan
- Spray large pan with oil and heat on medium/high
- As the pan is warming, uncover beets and through parsley and sea salt onto the salsa - cover and place heat on low
- Once large pan is warm, add all three Tuna Steaks
- Cook each side for 3 minutes then transfer to dishes and serve with salsa

Feel free to add baked vegetables (like we did), salad, mashed potatoes, or whatever!

Voila! Easy peasy husband fancy-schmance birthday din!

Wednesday, January 7, 2015

Herb Crusted Salmon with Roasted Root Vegetables (light and healthy!)

My first attempt pan searing salmon was a success! So successful that my step-daughter requested seconds (unfortunately I only bought 3 portions - I will know better next time)! If you and your family are looking for a filling meal that wont make waves with the waistline - this is it, promise! Why? Because I'm crazy about my fat/carb/calorie intake! Like...really crazy...which is sad and great at the same time. Gotta have some balance right? heh...hrm. Anyway. Follow the directions below and do not be alarmed when you see I use spray oil instead of real olive oil - your fish will not be dry, your fish will be moist and taste amazing, guaranteed!

Recipe Deets

Salmon
3 6-ounce portions wild Alaskan salmon
Gallon sized ziplock bag
Fresh thyme
Italian seasoning mix
Smoked Paprika
Sea salt

Kiwi Mango Salsa
2 kiwi
1 mango
dab of organic orange juice (or fresh squeezed orange juice)
chopped cilantro to taste

Roasted Root Vegetables
4 large carrots cut into "fries"
2 beets (cubed)
2 red peppers (sliced) - yea I know they're not a root veg, but I have approx. 4 large bags of them
Any other root vegetable
Fresh thyme to taste
Fresh parsley to taste

1st - Prepare Vegetables
- Preheat oven to 450°
- Place prepared vegetables on a baking sheet coated with spray oil
- Sprinkle fresh thyme and parsley (to taste)
- Place in oven for 30 minutes

2nd - Prepare Salsa
- While vegetables are cooking, prepare your salsa
- In a small bowl, mix mango, kiwi, orange juice, and cilantro
- Place in 'fridge

3rd - Prepare Salmon
- In ziplock bag, place all seasoning (to taste)
- Throw in each individual portion separately and coat with seasoning
- Place on dish and wait for vegetables to finish roasting

Final Step
- Once vegetables are done, remove from oven and arrange on plates
- Heat large frying pan (medium/high) and coat with spray oil
- Once warm, place each portion on pan and fry each side 3-4 minutes
- Once done, place salmon on plates with a bit of salsa on each

Voila! Now go make yourself a protein baby in yo' belly!

Sunday, December 28, 2014

Affordable, Light Eats for the New Year x2!

It's the new year soon! So that means resolutions and all that, correct? How about naaaaah?? Let's stop making resolutions and start living our lives how we know we SHOULD? Ok, that's not going to happen either (heh...heh), but at least we can take control over one thing--our bodies.

Recipe #1 Deets

Zucchini Noodle Stir Fry (low fat, low salt, gluten free, vegan, soy free, free of free, not raw)

4 cups zucchini/squash julienned
1 cup cherry tomatoes (halved)
1 white onion diced
1/2 cup chopped carrots
1/2 cup chopped celery
fresh thyme to taste
fresh parsley to taste (I used dried because I didn't have fresh...wah)

- Cover a large frying pan with spray oil and add onion until translucent (medium heat - 3-5 min)
- Throw in carrots and celery--fry for another 5 minutes
- Throw in tomatoes and zucchini--mix, cover, and reduce heat to low--simmer for about 10 minutes until zucchini has softened
- Add thyme/parsley and up heat to medium--fry for another 5 min
- Serve hot
- Smash in face


Recipe #2 Deets

Zucchini Quinoa Soup (free of anything that makes you worry about weight and tum tums)

6 cups low sodium, organic vegetable broth
1/2 cup quinoa
1/2 cup white onion (chopped)
1/2 cup carrots (chopped)
1/2 cup celery (chopped)
2 cups zucchini/squash julienned
1 bay leaf

- Placed everything in a large pot on medium/high heat
- Once it boils, reduce to medium/low and cook for 30-40 minutes
- Serve hot
- SMASH IN FACE

GUH! Almost as good as kisses from my baby daughter...if she gave kisses to people and not just inanimate objects...I can dream, right?

Enjoy!

Thursday, December 4, 2014

Vegan, Gluten Free Banana Protein Bars!

My step-daughter recently exclaimed, "I want to start eating more healthy! No more rice krispie treats or fruit snacks!" Ok...

The thing is, I have been trying for YEARS to get this child to want to eat more healthy, and all it took was watching Super Size Me in health class. I need to learn to be more tactful and creative when attempting to instill healthy habits on to a teenaged girl. Either way, I'm super glad she has decided, for the most part, to join me with a healthier eating style!

First up: homemade protein bars! Asa, the daughter from another motha', claims she's always tired. I'm thinky thinking it may have a lot to do with lack of a solid, protein-filled breakfast (waffles ain't cuttin' it lady), so why not create something easy peasy, healthy, yummeroo for your mouth buds??

Recipe Deets (makes 6-8 bars)

1 cup gluten free rolled oats
1/2 tsp baking powder
1/4 tsp baking soda
dash of salt
1/2 cup unsweetened vanilla almond mik (or milk of choice)
1/4 cup crunchy peanut butter
3 tbsp agave
1/2 cup mashed banana (about one reg banana)

Choco Drizzle

Handful of non-dairy chocolate chips (I use Enjoy Life because they're free of gluten, dairy, and soy)
dab of coconut oil

Preheat oven to 350 degrees F

- Spay a small baking pan (like a bread/loaf pan)
- Combine all ingredients and mix thoroughly
- Add to pan and bake for 20-25 minutes or until toothpick comes out clean
- Set aside to cool
- Once cool, make chocolate drizzle
- Heat choco chips and coconut oil in a small pan, once melted drizzle on top of them thar bars!
- Cut once cool and store in an air tight container either in the fridge or in a cool spot in your winter wonderland home

Now go use that mouth of yours and eat those ba-nay-nay bars!


Sunday, November 23, 2014

Vegan, Gluten Free Peanut Butter Energy Bites!

These little dudes are super easy to make and contain only 5 ingredients! They're based on an adaptation of another energy bite recipe I made during the summer but cannot recall. Hrm. Anyway, the whole recipe said and done takes about 20-25 minutes, which is perfect because I have a little infant crawling around and she allows approximately 5-10 minute spans of time where she doesn't necessarily need my undivided attention. It's tiring to tell you the truth ha...ha

Recipe Deets

1 cup gluten free rolled oats
1/4 almond flour
1/4 cup vegan choco chips (I use Enjoy Life)
1/4 cup shredded, unsweetened coconut
2/3-1 cup peanut butter or nut butter of choice (I used reconstituted peanut butter due to less fat/cals)

Preheat oven to 350 F
- In a big ol bowl toss all ingredients except peanut butter
- Now add the peanut butter and mix thoroughly
- Roll ingredients with your own two hands into the size of golf bowls
- Place on parchment paper covered baking sheet
- bake 5 minutes
- Seal in an air tight container

I suggest heating them up in a toaster oven whenever you feel the need to munch. Though! Cold is fine and dandy too!

Now go fill your mouth with some protein packed energy.

Monday, October 27, 2014

Zucchini "Pizza"

 
I don't eat pizza. <---- Is that not the saddest thing you've read all week, no wait, in your LIFETIME? It's true! I just don't. The last time a slice of pizza met my mouth in a glorious reunion was approximately 11-12 years ago...I was 18. Little ol 18 year old me, just minding her own business, eating this, consuming that, and not paying attention to her health. Silly teenaged me. Well, as what usually occurs when something high fat/high carb/high in amazingness touches my belly, I gained weight. Oh it wasn't just the pizza, but that had to hit the road just for good measure.
 
So here we are today, over a decade later, and gosh darnit I'm gonna have myself a GD pizza in the form of a well-seasoned, low-fat, low-carb, no-hurt-my-belly la piiiizza squash!
 
:s
 
Recipe Deets
 
2 yellow squash cut in half length-wise
1 pint of cherry tomatoes halved
1/2 white onion chopped
2 gloves of garlic minced
salt to taste
basil/thyme/parsley (dried, unless you have the real thang)
Grated Parm cheese
 
Pre-heat oven to 375°
 
- Line a baking pan with foil and place cut squash in a row (like boats in a marina)
- In a medium frying pan, spray some oil and heat the pan at medium/high, then add the onions
- Let the onions simmer a bit (2-3 minutes) then add tomatoes
- Season with salt and Italian mix (basil, thyme, parsley)
- Add garlic and cook for about 10 minutes on medium
- As stuffs are a-cookin', season the squash by drizzling some olive oil and shaking some of that Italian mixture over top of each
- Once you're done cooking your tomatoes, pile on top of each squash 
- Sprinkle as much parm cheese as you would like!
- Stick in oven for 25-30 minutes until squash is super soft and lightly brown on the edges
 
Now go enjoy your pizza boat!


Thursday, October 23, 2014

Sriracha Baked Cauliflower With a Balsamic Reduction


This super cheap, super simple dinner (or side dish) is low in carbohydrates, fat, and sugar; plus it's vegan and gluten free! Daaaaang, right? RIGHT?

So here you have it, a mid-weeknight-I-don't-feel-like-cooking-meal.

Recipe Deets

1 head of cauliflower (diced into small florets)
sriracha sauce
1/2 cup balsamic vinegar
1/2 cup chopped scallions (green onion)

Pre-heat oven to 450°

- Pour vinegar into a small sauce pan on medium/high heat and let sit (for about 10-15 minutes, stirring occassionally)
- Line a baking pan with tin foil and spray with oil
- Toss cauliflower florets in as much sriracha as you like! Don't drown it, but cover the stuff
- Put the covered florets on the baking sheet and place in the oven for 10 minutes
- As they're cooking, check vinegar and stir
- After 10 minutes, move the cauliflower around and bake for another 10 minutes
- Remove your vinegar from heat and it should start to thicken, stir
- Remove cauliflower from oven, place in an open dish, and drizzle with vinegar
- Add scallions and serve immediately

Voila! Yummo!

Monday, October 20, 2014

Gluten Free, Vegan Sweet Potato Choco Chip Brownies

 
I'm not a huge fan of Halloween. Even as a child, it was mainly about the candy I would gather within 2 hours of going door to door than what costume I would wear. My mother made our costumes throughout childhood and up until high school. She also entered pumpkins into to various school contests, which "we" won a few years in a row until the school caught on and insisted that students decorate their OWN pumpkins (what? 10 year olds can't make a replica of the Tin Man AND Medusa??), let's just say the contests ended there. As I entered college (and after) I went to various parties, but made little attempt at creativity, i.e. zombie Dorothy, white cat, black cat...
 
So! Perhaps I'm embracing sweet potato more than pumpkin flavors this autumn as my personal endeavor to downplay the already extremely abundant pumpkin-ized food items out there. Don't get me wrong, I'm all for baking pumpkin as you would a squash and then consuming its insides, but grabbing a buncha cans of pre-made puree isn't my idea of creating an autumnal treat. Or maybe I'm just jealous I cannot consume said treats ;>  booo
 
 
Recipe Deets (adapted from a regular brownie recipe)
 
1/4 cup gluten free rolled oats (pulverize in a food processor)
1/4 cup reg gluten free flour (you can use all oats, but I didn't want to risk a weird texture)
1/2 cup unsweetened cocoa powder
2/3-1 cup sweet potato (about one medium potato baked/skinned/mashed)
2 tsp vanilla extract
2 flax eggies (or two real eggs if not vegan)
3 tbsp coconut oil (or oil of choice, I just prefer coconut)
1/3 cup almond milk (or reg milk if not vegan)
1 tsp baking soda (is this needed? it was in the regular brownie recipe so I used it)
1/3 cup vegan chocolate chips (I used Good Life)
 
Preheat oven to 350°
 
- Combine everything except chocolate chips
- Create a smooth batter (I used a hand blender, but that's up to you)
- Fold in chocolate chips
- Place in a square 8x8 or 9x9 greased pan (or whatever according to how thick you want them)
- bake 25 minutes (if you can't pull out a toothpick without a chocolate, sticky mess, they aren't done)
 
You can add icing of choosing. I just made a simple brown sugar icing, but my step-daughter/husband said they would prefer them without icing...who knew.
 
Done and done! Now go get yourself a pumpkin latte with a pumpkin muffin along with some salted pumpkin seeds!


Saturday, October 4, 2014

Chewy Gluten Free, Vegan Sweet Potato Choco Chip Cookies

With all the pumpkin this and pumpkin that talky-talk, I thought I'd bring you another fall favorite (well, year 'round fav, no lie) of mine ~ sweet potato! I know what you're thinkin' "day-um girl, how you do that?" Well, aren't you in luck, because I'm-a gonna tell ya! (Also, we all know my next recipe will probably have a lil pumpkin in it haha)

Recipe Deets

1 sweet potato (cooked and pureed - equals about a cup)
1/2 cup gluten free oats
1/4 cup of organic peanut butter
lil dab of agave (about, ummm, 1-2 tbsp)
1 flax egg (or real eggy if not vegan)
1/2 cup vegan (or reg) choco chips
1/2 tsp vanilla extract
cinnamon to taste
tiny bit of ground ginger
lil bit of ground sea salt
1/2 tsp baking soda
1/2 tsp baking powder

Pre-heat oven to 350

- Combine your cooked and cooled sweet potato with the oats, peanut butter, agave, and flax egg - blend until smooth-ish
- Slap in everything else (other than the chocolate chips) and combine
- Gently fold in chocolate chips
- Measure about a tablespoon size of dough onto a greased baking sheet
- Bake about 15-20 minutes according to your oven

Done and done! Now go carve some pumpkins or something!


Sunday, September 7, 2014

Vegan, Gluten Free Light Chocolate Chip Peanut Butter Buddy!

I call this little bar a buddy because it's light, friendly, and totally looks out for you! Kinda like a good ol pal or a...buddy! I took a traditional peanut butter bar recipe, made it gluten free/vegan, and took out the heavy, unhealthy ingredients. Best part about this recipe, it's super easy!

Recipe Deets

1 1/4 cup gluten free flour (I use Bob's Mill)
1/2 cup unsweetened apple sauce
2/3 cup peanut butter (I used crunchy because that's what my step-daughter digs)
1/2 light brown sugar (or sugar substitute of choice)
1 tsp baking powder
1/4 cup vegan chocolate chips (optional, for inside the bars - I use Enjoy Life)
1/2 tsp vanilla extract

another 1/4 cup vegan chocolate chips (melted for the drizzle)

Preheat oven to 350 F

- put parchment paper in an 8x8 or 9x9 pan, set aside
- in a large bowl add apple sauce and peanut butter - blend with a mixer or hand mixer
- add flour, peanut butter, sugar, baking powder,  and vanilla - blend
- fold in chocolate chips (optional)
- place mixture in the pan and flatten evenly
- bake for 22-25 minutes until lightly brown along the edges
- let cool for about 15-20 minutes
- heat 1/4 cup chocolate chips in a non-stick pan, once melted take a fork and drizzle chocolate over the finished buddy
- let cool for another 15 minutes, then cut and serve!

Blamo!

Monday, September 1, 2014

First Foods: Banana Whip

This one is super easy!

I usually buy about 3 pounds of bananas at a local fruit and vegetable market for about $1.25. I store them by peeling the bananas and putting them in the freezer (in a freezer safe zip lock) for future use.

Recipe Deets

3 frozen bananas (some for yourself also haha)

- Use either a homogenizer, high powered blender, or food processor
- Process the bananas until they are a custard
- Serve cold!
such the lady

Easy peasy!

Monday, August 4, 2014

Gluten Free, Vegan Zucchini Cupcakes

My mother purchases fresh zucchini, tomatoes, and onions from whom she calls "the little old man down the street." Essentially, he's a rather small Italian man that has an equally small garden, which he tends with his tiny hands, and then sells his product out of a mini-garden stand. It's all very adorable, you see?

Anyway, my mother is his biggest customer and tends to over-purchase said zucchini, thus it ending up in my  home. Here's the catch: Rick (husband) and Asa (step-daughter) truly dislike zucchini, and while I dig it, I'm not a huge fan where I could consume mass amounts of the soft, semi-tasteless vegetable. Here's where the cupcakes come in: Operation Trick Spouse & Step-Daughter With Disguised Desserts.
It was a Sunday when I sort of lazily thought, why not just add zucchini to my already kinda awesome cupcake recipe and throw some cream cheese frosting on top? So, that's just what I did, and, it worked! *Applause*

Recipe Deets

Cupcakes
1 1/2 Gluten free flour
1 cup Shredded/chopped zicchini
1/2 tbsp Baking powder
Dash of cinnamon to taste
Dash of salt
1 Flax egg
2/3 cup Agave
1/2 cup coconut oil
1 tsp vanilla extract

Set oven to 360°
- Combine all dry ingredients...stir
- Add all wet ingredients...stirrrrr
- Throw in a greased muffin pan and bake for approximately 15 minutes or until a toothpick pulls out clean, let cool on a wire rack before icing.

Icing
1/2 cup of Smart Balance butter or vegan butter of choice
6 ounces Tofutti cream cheese
2 cups confectioners sugar (eesh, right?)
2 tsp vanilla extract

- Blend until smooth and place in 'fridge until you're ready to apply to the cupcakes

Blam-o!